| Contact Us for Quotation | Email:464560351@qq.com | Whatsapp: +8618620373879 |
Product Introduction
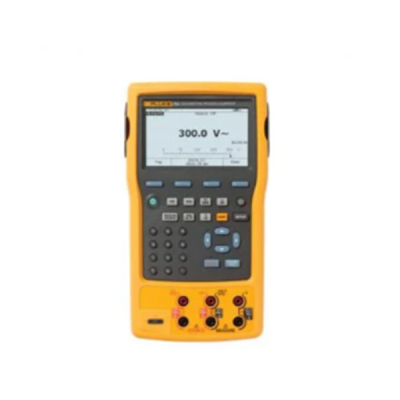
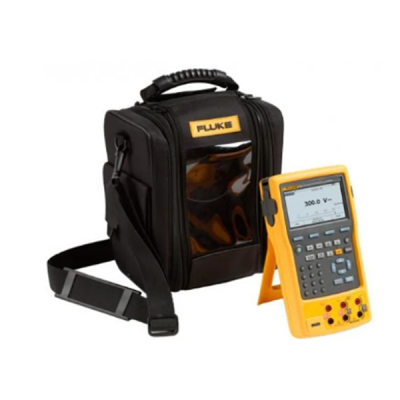
The 754 is a power multifunction documenting calibrator that you can use to download procedures, lists, and instructions created with software; or upload data for printing, archiving, and analysis. The powerful built-in HART interface is capable of performing nearly all the day-to-day tasks you now perform with a separate communicator. In fact, the 754 does the work of several tools. It sources, simulates and measures pressure, temperature, and electrical signals with one rugged, hand-held device. For documentation, the 754 automates calibration procedures and captures your data. And, of course, it helps you meet rigorous standards like ISO 9000, FDA, EPA and OSHA regulations. Plus, the new improved graphical screen, Li-Ion battery for longer life, USB port, and accessories help you work smarter and faster. |
other useful features |
Handles fast pulsed RTD transmitters and PLCs, with pulses as short as 1 ms Measures/sources pressure using any of 29 Fluke 700Pxx Pressure Modules Creates and runs automated as-found/as-left procedures to satisfy quality programs or regulations, and records and documents results Holds up to a full week of downloaded procedures and calibration results Uses many features like autostep, custom units, user-entered values during test, one-point and two-point switch testing, square root DP flow testing, programmable measurement delay and more Provides easy-to-use multi-lingual interface Features a bright white dual display for reading both sourced and measured parameters simultaneously Includes rechargeable Li-Ion battery for 10 hour uninterrupted use Comes with three-year warranty and DPC/Track Sample software Offers compatibility with many asset management software package |
Specification
| Measurement Accuracy | |||||
| Voltage DC | Range/ Resolution | 1 Year | 2 Years | ||
| 100.000 mV | 0.02% + 0.005 mV | 0.03% + 0.005 mV | |||
| 3.00000 V | 0.02% + 0.00005 V | 0.03% + 0.00005 V | |||
| 30.0000 V | 0.02% + 0.0005 V | 0.03% + 0.0005 V | |||
| 300.00 V | 0.05% + 0.05 V | 0.07% + 0.05 V | |||
| Voltage AC | 3.000 V (40 Hz to 500 Hz) / 0.001 V | 0.5% + 0.002 V | 1.0% + 0.004 V | ||
| 30.00 V (40 Hz to 500 Hz) / 0.01 V | 0.5% + 0.02 V | 1.0% + 0.04 V | |||
| 300.0 V (40 Hz to 500 Hz) / 0.1 V | 0.5% + 0.2 V | 1.0% + 0.2 V | |||
| Current DC | 30.000 mA | 0.01% + 5 uA | 0.015% + 7 uA | ||
| 110.00 mA | 0.01% + 20 uA | 0.015% + 30 uA | |||
| Resistance | 10.000 Ω | 0.05% + 50 mΩ | 0.07% + 70 mΩ | ||
| 100.00 Ω | 0.05% + 50 mΩ | 0.07% + 70 mΩ | |||
| 1.0000 kΩ | 0.05% + 500 mΩ | 0.07% + 0.5 Ω | |||
| 10.000 kΩ | 0.1% + 10 Ω | 0.15% + 15 Ω | |||
| Frequency | 1.00 to 110.00 Hz / 0.01 Hz | 0.05 Hz | |||
| 110.1 to 1100.0 Hz / 0.1 Hz | 0.5 Hz | ||||
| 1.101 to 11.000 kHz / 0.001 kHz | 0.005 kHz | ||||
| 11.01 to 50.00 kHz / 0.01 kHz | 0.05 kHz | ||||
Source Accuracy 1 Year 2 Years Voltage DC 100.000 mV 0.01% + 0.005 mV 0.015% + 0.005 mV 1.00000 V 0.01% + 0.00005 V 0.015% + 0.0005 V 15.0000 V 0.01% + 0.0005 V 0.015% + 0.0005 V Current DC 22.000 mA (source) 0.01% + 0.003 mA 0.02% + 0.003 mA Current sink (simulate) 0.02% + 0.007 mA 0.04% + 0.007 mA Resistance 10.000 Ω 0.01% + 10 mΩ 0.015% + 15 mΩ 100.00 Ω 0.01% + 20 mΩ 0.015% + 30 mΩ 1.0000 kΩ 0.02% + 0.2 Ω 0.03% + 0.3 Ω 10.000 kΩ 0.02% + 3 Ω 0.03% + 5 Ω Frequency 0.1 to 10.99 Hz 0.01 Hz 0.01 to 10.99 Hz 0.01 Hz 11.00 to 109.99 Hz 0.1 Hz 110.0 to 1099.9 Hz 0.1 Hz 1.100 to 21.999 kHz 0.002 kHz 22.000 to 50.000 kHz 0.005 kHz Technical Data Data log functions Measure functions Voltage, current, resistance, frequency, temperature, pressure Reading rate 1, 2, 5, 10, 20, 30, or 60 readings/minute Maximum record length 8000 readings (7980 for 30 or 60 readings/minute) Ramp functions Source functions Voltage, current, resistance, frequency, temperature Rate 4 steps/second Trip detect Continuity or voltage (continuity detection not available when sourcing current) Loop power function Voltage Selectable, 26 V Accuracy 10%, 18 V minimum at 22 mA Maximum current 25 mA, short circuit protected Maximum input voltage 50 V DC Step functions Source functions Voltage, current, resistance, frequency, temperature Manual step Selectable step, change with arrow buttons Autostep Fully programmable for function, start delay, stepvalue, time per step, repeat Environmental Specifications Operating temperature -10°C to +50°C Storage temperature -20°C to +60°C Dust/water resistance Meets IP52, IEC 529 Operating altitude 3000 m above mean sea level (9842 ft) Safety Specifications Agency approvals CAN/CSA C22.2 No 1010.1-92, ASNI/ISA S82.01-1994, UL3111, and EN610-1:1993 Mechanical and General Specifications Size 136 x 245 x 63 mm (5.4 x 9.6 x 2.5 in) Weight 1.2 kg (2.7 lb) Batteries Internal Battery Pack Li-ion: 7.2V,4400mAh, 30 Wh Battery life >8 hours typical Battery replacement Replace without opening calibrator; no tools required Side port connections Pressure module connector USB Connector to interface to your PC Digital instrument (HART) connector Connection for optional battery charger/eliminator Data storage capacity 1 week of calibration procedures results 90 day specifications The standard specification interval for the 750 Seriesare 1 and 2 years. Typical 90 day measurement and source accuracy can be estimated by dividing the one year "% of reading" or "% of output" specifications by 2. Floor specifications, expressed as "% of full scale" or "counts" or "ohms" remain constant. Temperature, Resistance Temperature Detectors Degrees or % of reading - Type (α) Range °C Measure °C1 1 year 2 year 100 Ω Pt (385) -200 to 100
100 to 8000.07°C
0.02% + 0.05°C0.14°C
0.04% + 0.10°C200 Ω Pt (385) -200 to 100
100 to 6300.07°C
0.02% + 0.05°C0.14°C
0.04% + 0.10°C500 Ω Pt (385) -200 to 100
100 to 6300.07°C
0.02% + 0.05°C0.14°C
0.04% + 0.10°C1000 Ω Pt (385) -200 to 100
100 to 6300.07°C
0.02% + 0.05°C0.14°C
0.04% + 0.10°C100 Ω Pt (3916) -200 to 100
100 to 6300.07°C
0.02% + 0.05°C0.14°C
0.04% + 0.10°C100 Ω Pt (3926) -200 to 100
100 to 6300.08°C
0.02% + 0.06°C0.16°C
0.04% + 0.12°C10 Ω Cu (427) -100 to 260 0.2°C 0.4°C 120 Ω Ni (672) -80 to 260 0.1°C 0.2°C Source current Source °C Allowable current2 1 year 2 year 1 mA 0.05°C
0.0125% + 0.04°C0.10°C
0.025% + 0.08°C0.1 mA to 10 mA 500 μA 0.06°C
0.017% + 0.05°C0.12°C
0.034% + 0.10°C0.1 mA to 1 mA 250 μA 0.06°C
0.017% + 0.05°C0.12°C
0.034% + 0.10°C0.1 mA to 1 mA 150 μA 0.06 C
0.017% + 0.05°C0.12 C
0.034% + 0.10°C0.1 mA to 1 mA 1 mA 0.05°C
0.0125% + 0.04°C0.10°C
0.025% + 0.08°C0.1 mA to 10 mA 1 mA 0.05°C
0.0125% + 0.04°C0.10°C
0.025% + 0.08°C0.1 mA to 10 mA 3 mA 0.2°C 0.4°C 0.1 mA to 10 mA 1 mA 0.04°C 0.08°C 0.1 mA to 10 mA 1. For two and three-wire RTD measurements, add 0.4°C to the specifications.
2. Supports pulsed transmitters and PLCs with pulse times as short as 1 ms


 English
